|
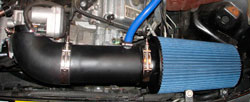
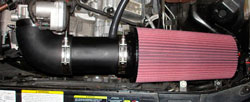
Frankentakes I and II were products manufactured professionally by others ... that I worked over with a hacksaw. My idea for Frankentake III was a from-scratch product. Its design mandate was to be made up of readily available parts. The parts chosen were both inexpensive and of high quality. Further, those parts had to be easily assembled with minimal fabrication work and tools the typical person already had in their garage. Lastly and most importantly, it was to be a quality solution whose performance, fit and finish would rival or exceed that of commercial products at a small fraction of their cost.
 |
|
|
 |
 |
|
|
 |
 |
|
|
Click image for a larger view. |
 |
|
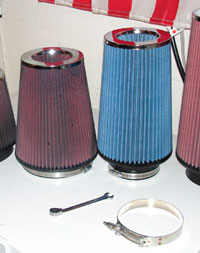
Final cost, with shipping included, wound up being just over $100. There were two models. The first, with a 10" filter that was even larger than the already oversized 9" filter of the earlier Frankentakes, proved to be the optimal performer. A second model with a ludicrously large 12" long filter proved to be the sentimental favorite, providing many with a conversation starter at car shows and paddocks across the country. However, testing showed the filter to be so long its size exceeded the ambient air pocket known to be in that area
In the end, the project wound up being enormously successful. Dyno tests showed it to be competitive with other units whose price points were much higher. It looked attractive and had the aggressive sound people were looking for. All at, most importantly, a very modest cost. To date, hundreds have been built. Dozens were made by myself and a team of volunteers as a fundraiser for a worthy cause. That experience convinced me I do not want to be involved in the manufacturing business, to the dismay of many who have asked me to build one for them (this gap has been filled as, with my blessing, Legmaker Intakes sells a gorgeous carbon-fiber version, still at a very low cost.
|
|
 |
 |
 |
|
|
|
TOOLS
- A 1/2'' hole saw with pilot bit (may substitute 7/16'' or 15/32'')
- 10mm box-end or crescent wrench
- 19mm box end or crescent wrench (optional)
- A hacksaw with a bow deep enough to accomodate a 4'' tube (optional)
- Plastic mitrebox (optional)
- Metal buffing brush (optional)
- 5/8" drill bit (optional)
- 3M adhesive Red Body Tape or Tommy Tape
|
 |
|
|
| ASSEMBLY |
 |
|
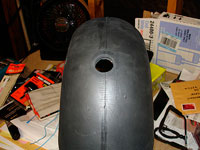
Starting with the rubber reducing elbow, use a 1/2'' drillbit to make a hole for the Intake Air Temperature sensor. The sensor is actually made to fit into a 1/2'' hole, so if you have a 7/16'' or 15/32'' bit, try drilling it slightly undersized to ensure an airtight fit. Take care to drill the hole close enough on the elbow so your intake sensor cable will properly reach and retain proper slack.
Stuff the Intake Air Temperature sensor into the hole you have drilled by partially pressing the sensor into the hole. Then take the heel of your leather-gloved palm and use it to slowly press the sensor through until it seats. Use the fintgers of your other hand to provide support to the elbow so you don't push the sensor completely through the hole or smash it into the other side of the elbow; breaking it (Note: Replacement sensors are about $25).
|
 |
 |
 |
|
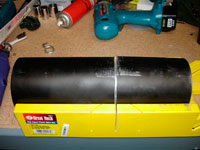
Place the tube in the mitrebox and, with the hacksaw, carefully cut the tube to the needed size, which will vary depending on your choice of filter. For a 10'' filter, an 8'' length is sufficient.
Do not paint the tube before cutting or you will have to paint it again, as seen in the photo.
Buff the edges that you have just cut to remove any burrs, and take extreme care to clean out any metal shavings that are sticking to the inside of the tube.
OR...
Save yourself all of the above trouble and ask the tubing vendor to cut to your preferred size before shipping. The vendor linked above will do this for $2.
|
 |
 |
 |
|
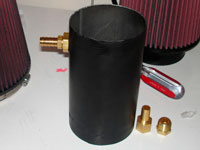
Drill the hole for the gas recirc fitting into the alloy tube. Exact placement is not particularly important except that you must make sure there is more than enough room at either side to fit the tube into the elbow and filter, as well as for the locknut.
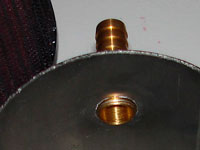
Fit the locknut to the hose barb and tighten it down. The locknut is not used to clamp the barb to the filter, but rather as a stabilizing surface when you screw the barb into the 5/8'' hole with your 19mm box wrench, which just happens to be the right size to allow a 1/2'' MPT hard brass fitting to screw into soft alloy. This is another reason to choose the thinnest alloy tubing available.
If you are concerned about longevity, apply a little JB Weld to the threads before insertion
OR...
Skip the above step entirely and fit a 1/2'' clamp-on crankcase breather filter onto the intake manifold. This will eliminate the hose, barb and locknut from the parts list. Crankcase breathers are commonly available at auto parts stores, or many places (such as here) online.
|
 |
 |
 |
|
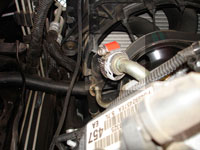
The hose clamp is used to make a handy 'armrest' upon which the intake will sit. A bit of red sticks-forever 3M body tape attached to the top of the hose clamp (see picture) will create a rattle-free support surface that will last for years. As an alternative to the 3M tape, wrapping the installed clamp in silicone/rubber Tommy Tape or similar heat-resistant material will provide the same benefit.
Take care to torque the hose clamp tightly, but not so much that you deform the underlying clamp.
|
 |
 |
 |
|
Assuming you performed any of the above cutting and drilling steps yourself rather than utilizing one of the alternatives, no further fabrication is needed. Simply bolt together the parts. Take note that T-Bolt clamps were specified because of their reputation for never coming loose, unlike hose clamps, which have been known to vibrate loose on various aftermarket intakes. T-bolt clamps are also very strong. Do not overtorque them or you risk crushing what they are clamping down upon.
|
|


